

In today’s digital world, great visuals are everything. Whether you’re building a personal brand, managing a business, or simply sharing moments online, a well-edited photo can instantly elevate your image. But if you’re new to photo editing, the process can seem overwhelming at first.The Ultimate Guide to Photo Editing for Beginners – 2025, will give you clear idea about the editing tools and tips.
Don’t worry, this guide breaks it down for you. When you’re done, you’ll be able to enhance your images, choose the right tools, and develop your own style of photo editing.
What Is Photo Editing and How A Person Can Excel it
Photo editing is the process of making an image better by modifying parameters like brightness, color, contrast, and sharpness. It helps eliminate flaws, improve the viewing experience, and get your creative message across more effectively.
A good edit can:
- Fix light or color issues from the original shot.
- Make your images more professional and eye-catching.
- Create consistency for your brand or portfolio.
- Increase engagement for websites and social media.
- Plain and simple — editing is what turns a good photo into an amazing one.
Choosing the Right Photo Editing Software for the beginners
Step one on your photo editing journey is selecting the right software. Your choice depends on your level of expertise, budget, and what kind of editing you plan to do.
Best for Newbies
Canva: Perfect for making quick, simple edits and adding creative text overlays.
Pixlr: An internet editor that is easy to use, light on resources, and supports layering.
Fotor: AI-based editing that simplifies editing for beginners.
Snapseed: Free mobile app that features professional-grade tools.
Best for Advanced Editing
Adobe Lightroom: Ideal for photographers who want detailed control over color and tone.
Adobe Photoshop: The gold standard for advanced photo manipulation and retouching.
GIMP: A free open-source alternative with powerful features.
If you’re just starting out, begin with easy, free tools — and upgrade as your skills grow.
Step-by-Step Photo Editing Workflow
Here’s a simple 9-step editing process beginners can follow for consistently great results.
1. Import and Organize
Start by importing your images and keeping them organized. Group them by project or date to make it easier in the future.
2. Crop and Straighten
Tidy up your composition. Use the rule of thirds to position your subject well, and straighten horizons for a newer look.
3. Adjust Exposure and Contrast
If the photo looks too dark, increase exposure a bit. Add a bit of contrast to make the photo pop — but don’t compromise on shadow detail or highlights.
4. White Balance the Correcting
Balance your colors so that whites don’t look artificial. Do it if you’ve been taking photos in mixed lighting.
5. Color Enhancement
Vibrance to make subtle color adjustments, and saturation for more dramatic colors. Tones should still look natural.
6. Sharpen to Refine
Use gentle sharpening to emphasize details, especially in product or outdoor photography.
7. Fix Flaws
Eliminate blemishes, spots, or distracting objects with healing or clone tools. Be delicate and unobtrusive with the touches.
8. Utilize Presets or Filters
Presets are a blessing for time-saving. Take one as a starting point and modify it for each photo to have uniformity.
9. Save and Export
Export your images in high-resolution for print or optimized web modes (e.g., JPEG or PNG).
This is The Ultimate Guide to Photo Editing for Beginners – for 2025
Natural and Professional Editing Tips for The Ultimate Guide to Photo Editing for Beginners – for 2025
- Make changes subtle, realism is more professional.
- Use before-and-after comparisons to avoid over editing.
- Establish a consistent look or tone of color.
- Avoid using too many filters.
- Maintain sharpness, but avoid textures becoming harsh.
- Remember: excellent editing enhances it doesn’t overwhelm.
- Developing Your Own Photo Editing Style
- Your editing style is your visual signature. To discover it:
- Experiment with tones, brightness, and contrast.
- Save presets of your favorite edits.
- Study photographers or brands whose visuals inspire you.
- Be consistent, your audience will start recognizing your “look.”
- With practice, your style will evolve naturally.
Editing Tips for Different Photo Types and our services
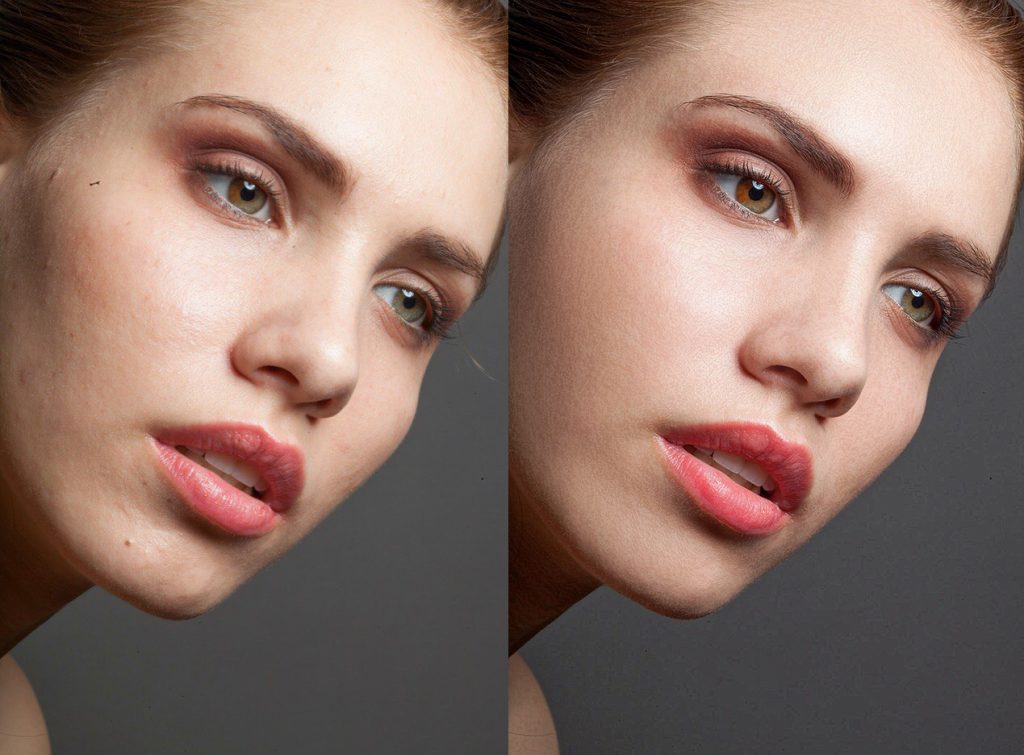
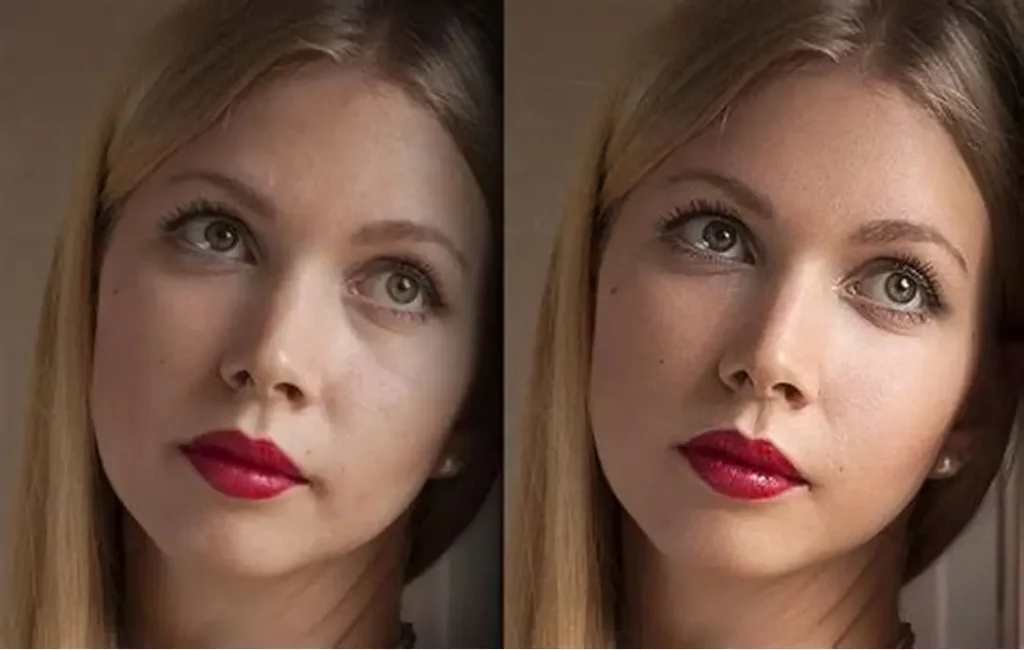
Portraits
- Brighten skin tones gently.
- Retouch blemishes while keeping texture.
- Enhance eyes and lips subtly for a natural glow.
Landscapes
- Increase clarity and depth.
- Enhance skies and greens for a rich look.
- Adjust shadows to create depth.
Product Photos
- Maintain proper color and brightness.
- use a clean background.
- Sharpness and texture are essential.
Food Photography
- Mildly enhance warm tones.
- Increase contrast for delicious detail.
- Steer clear of too dark or spotty lighting.
Common Photo Editing Blunders to Steer Clear Of.
Newbies make these avoidable blunders:
- Over-saturating colors
- Over-smoothing skin
- Cropping too tightly
- Overlooking background distractions
- Forgetting to save original copies
- Aim for balance — safer to under-edit than over-edit.
Photo Editing and Social Media Success
Influential visuals power social sharing. Here’s the reason why editing can be useful:
- Instagram: Use consistent tones and crisp edits to strengthen your brand.
- Facebook: Bright, high-quality photos perform best.
- Pinterest: Use vertical, high-resolution images.
- YouTube Thumbnails: Focus on clear faces, high contrast, and readable text.
Consistency in color, lighting, and mood makes your content stand out and appear professional.
AI and the Future of Photo Editing
Artificial intelligence has revolutionized editing today. Algorithms like Luminar Neo, Remove.bg, and Adobe Sensei utilize AI to drive advanced edits that involve background removal, sky replacements, and one-click retouching.
For beginners, AI software is a great way to save time without compromising on the quality of professional-level outcomes.
Final Thoughts
Photo editing is not just a technical challenge it’s an art. A novice, start small: adjust light, fix color, experiment with filters. The more you practice, the finer you will become.
Everyone was once a novice patience, persistence, and curiosity are the keys. With the proper techniques and equipment, you can make every photograph into something worth sharing.